Exhaust Fan Removal/Replacement on the Glowforge

Don’t mention that on the official forum. We certainly don’t need to be giving them ideas! (Although it would probably take them six years to implement so I guess it wouldn’t be the end of the world.)

1 Like

Wow, this is a major pain. When it’s time to clean my fan, I am going to think about making it mount externally, just on the other side where the finger guard is now.

4 Likes

I don’t know how good that fan is, but it may be worth spending the money on a quality replacement if the GF fan is like the typical Chinese import fans. Noctua makes a quality product, assuming they sell fans with the same specs.

ScottW514, thank you so much for posting this (and for the pics).
I followed your steps, and it as worked great so far (I’m writing this before putting it back together).

I wanted to let you and others know of one difference I ran into on my model (Basic).
The Ball-end hex key needed to remove my fan screws was 2mm, not 3mm. Maybe a difference in later models?
Thanks for the tip that a ball-end key would make a big difference…/.it certainly did for me.

3 Likes

Follow up. I got everything cleaned and put back together. Was not as hard to get it reinstalled than I feared.
I ran a simple score. Fan sounded SOO much better. Like when it was new. Vibrations were way down, also back to original I think.
So, I then ran a simple 2 minute cut. Again, sounded great. But now no smoke is coming out of the front, etc. Almost no smell. I could feel a slight airflow from the front going into the forge (rather than coming out). I take this to mean the case is again seeing negative pressure.

Completely satisfied. YMMV.

4 Likes

I just wanted to put in my 2 cents here. Getting those tabs to unlock was painful. I didn’t quite understand how they were latched. The idea of using a paint can opener was great except it wasn’t sharp enough to get behind the tab. I ground one down and it grabbed the tab without a hitch. Now in my Glowforge toolbox.

3 Likes
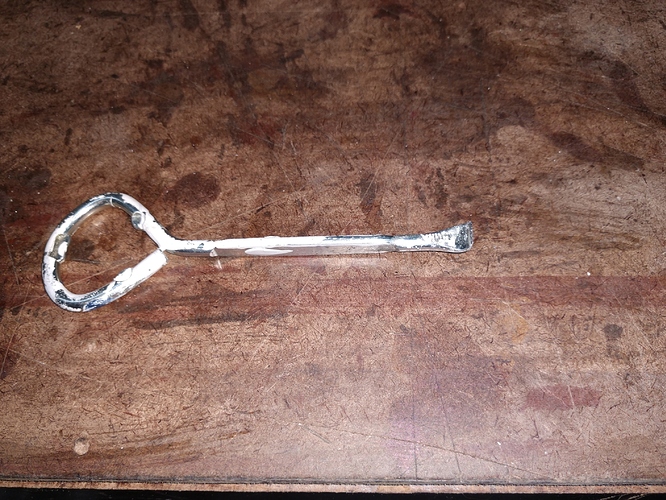
Thank you for the tip, @jglazer63! I’ve added a note to the main post.

@ScottW514 I am in the middle of cleaning my exhaust fan. I have pulled the foil tape, but I am confused on the plastic tab issue. I pull or pry them toward the inside of the GF in order to “unhitch” them from the rectangle shown on picture 5?

Sorry to bother you, but I’d sure like some “experienced” help.

Thank you.

1 Like

@jglazer63 and @ballewd

If you can help, as I see you have the experience too… please feel free to chime in on my behalf. I sent the following note to Scott:

I am in the middle of cleaning my exhaust fan. I have pulled the foil tape, but I am confused on the plastic tab issue. I pull or pry them toward the inside of the GF in order to “unhitch” them from the rectangle shown on picture 5?

Sorry to bother you, but I’d sure like some “experienced” help.

Thank you.

I actually just gone done cleaning mine. The tabs you see are attached to the top glass, and need to be pried towards the inside of the GF to release from the bottom of the case. *What I did was hook a pair of bent-nosed tweezers behind each tab, and then from the outside insert a spudger-like object through the gap between the top glass and the siding of the machine (anything relatively long and thin will do). Repeat for the other two tabs and the top should pop up easily.

*This could potentially permanently bent or dent the outside of your case

It took me a while to figure out what the tabs were and how to pry them. See if you can get a camera in there and take a photo of the holes. You might be able to get a better idea. You definitely need some sort of small angled tool to grab them and pull them.

As an aside, if your warrantee is up anyhow, you can do what I did and just cut the finger guard off the back of the exhaust fan so I can easily clean the fan from the outside and forego ever opening this up again.

1 Like

See my post in "First modification to my basic to see the tool I used. By inserting the sharpened edge under the tab and pushing down, the tab is deflected inward while the heel of the tool pushes out on the case.

The case wall is thin and is given rigidity by the top. There won’t be any damage to the case if you are careful.
See my thread “First Modification to my Basic”

@Drelleum @jglazer63 Thank you to all who answered my call for help. All went well and we are now “cage free” and printing up a storm!

Thank you!

1 Like

you too @PTL ! Thanks

1 Like

I used an auto trim removal tool like the one below. Dodn’t need to pull, just wedge it up between the clip attached to the glass and the retainer on the side of the case, where shown in the 2nd pic.

3 Likes

I did just that. Didn’t know this forum was here at the time. Cut the "finger guard " completely out, too. Woodcrafter’s store sells woodshop dust collector fittings that are easily modified into an external fan casing, and I used Scotchlock splices to extend the fan wiring back to the power pins inside.

Has anyone removed the fan completely / replaced it with an empty fan housing? If so, how much does it cut the noise on a pro unit? I’ve had mine hooked up to an external extractor for a long time, and even with the compact filter toggle on in the software, it still is pretty loud (and high pitched).

There are a few people who have. If you have a strong enough exhaust fan that can move at least 250 CFM (or so), you should be OK.

I have a BOFA extractor, so really the fan is probably obstructing the air flow more than helping. The question is more of how good removing that fan is for cutting the noise.

I removed both the exhaust fan and the fan grill. I have a booster with a 4" inlet and a 10 " impeller within 2 feet of the machine.
The stock exhaust fan runs @ 13,000 RPM and the booster runs at a fraction of that. The noise reduction is quite dramatic, and the airflow smoother without the obstruction of the fan grill.

My advice is do yourself a favor and lose the stock fan.

2 Likes