First Modification to my Basic

The first time the fan guard face loaded and restricted the exhaust, pumping smoke out of every crack in the machine and required cleaning the debris, I decided that fan guard had to go eventually. Today was the day.
Now I have had to clean it 3 times, it blocks cleaning the fan blades which had gathered such a deposit as to be out of balance and produce a hard vibration and loud buzz.

Thanks to Scott’s intrepid exploration, pictures, and advice, I was able to remove the top left cover of the machine and OMG - so easy to access everything on that side. I made a simple tool to pry back the 3 tabs on the cover…

Per Scott’s warning, I was very careful, and the force required was almost more than I was willing to put on those tabs, but nothing broke. It really is simple, removal and installation.

I pulled the fan to clean it good, and there… there was that redundant safety precaution that catches stuff and clogs up, restricts airflow (even when it’s clean), and requires that periodic PITA cleaning.
(Picture is after reinstallation of the fan. Note that the two rear thread bosses for the TEC have been shortened to give easy access to the bottom two fan screws, since a basic doesn’t have one)


Like Scott said, that bottom right screw is a bitch to get back in, but I managed it.

Enter a jigsaw and a metal cutting blade…
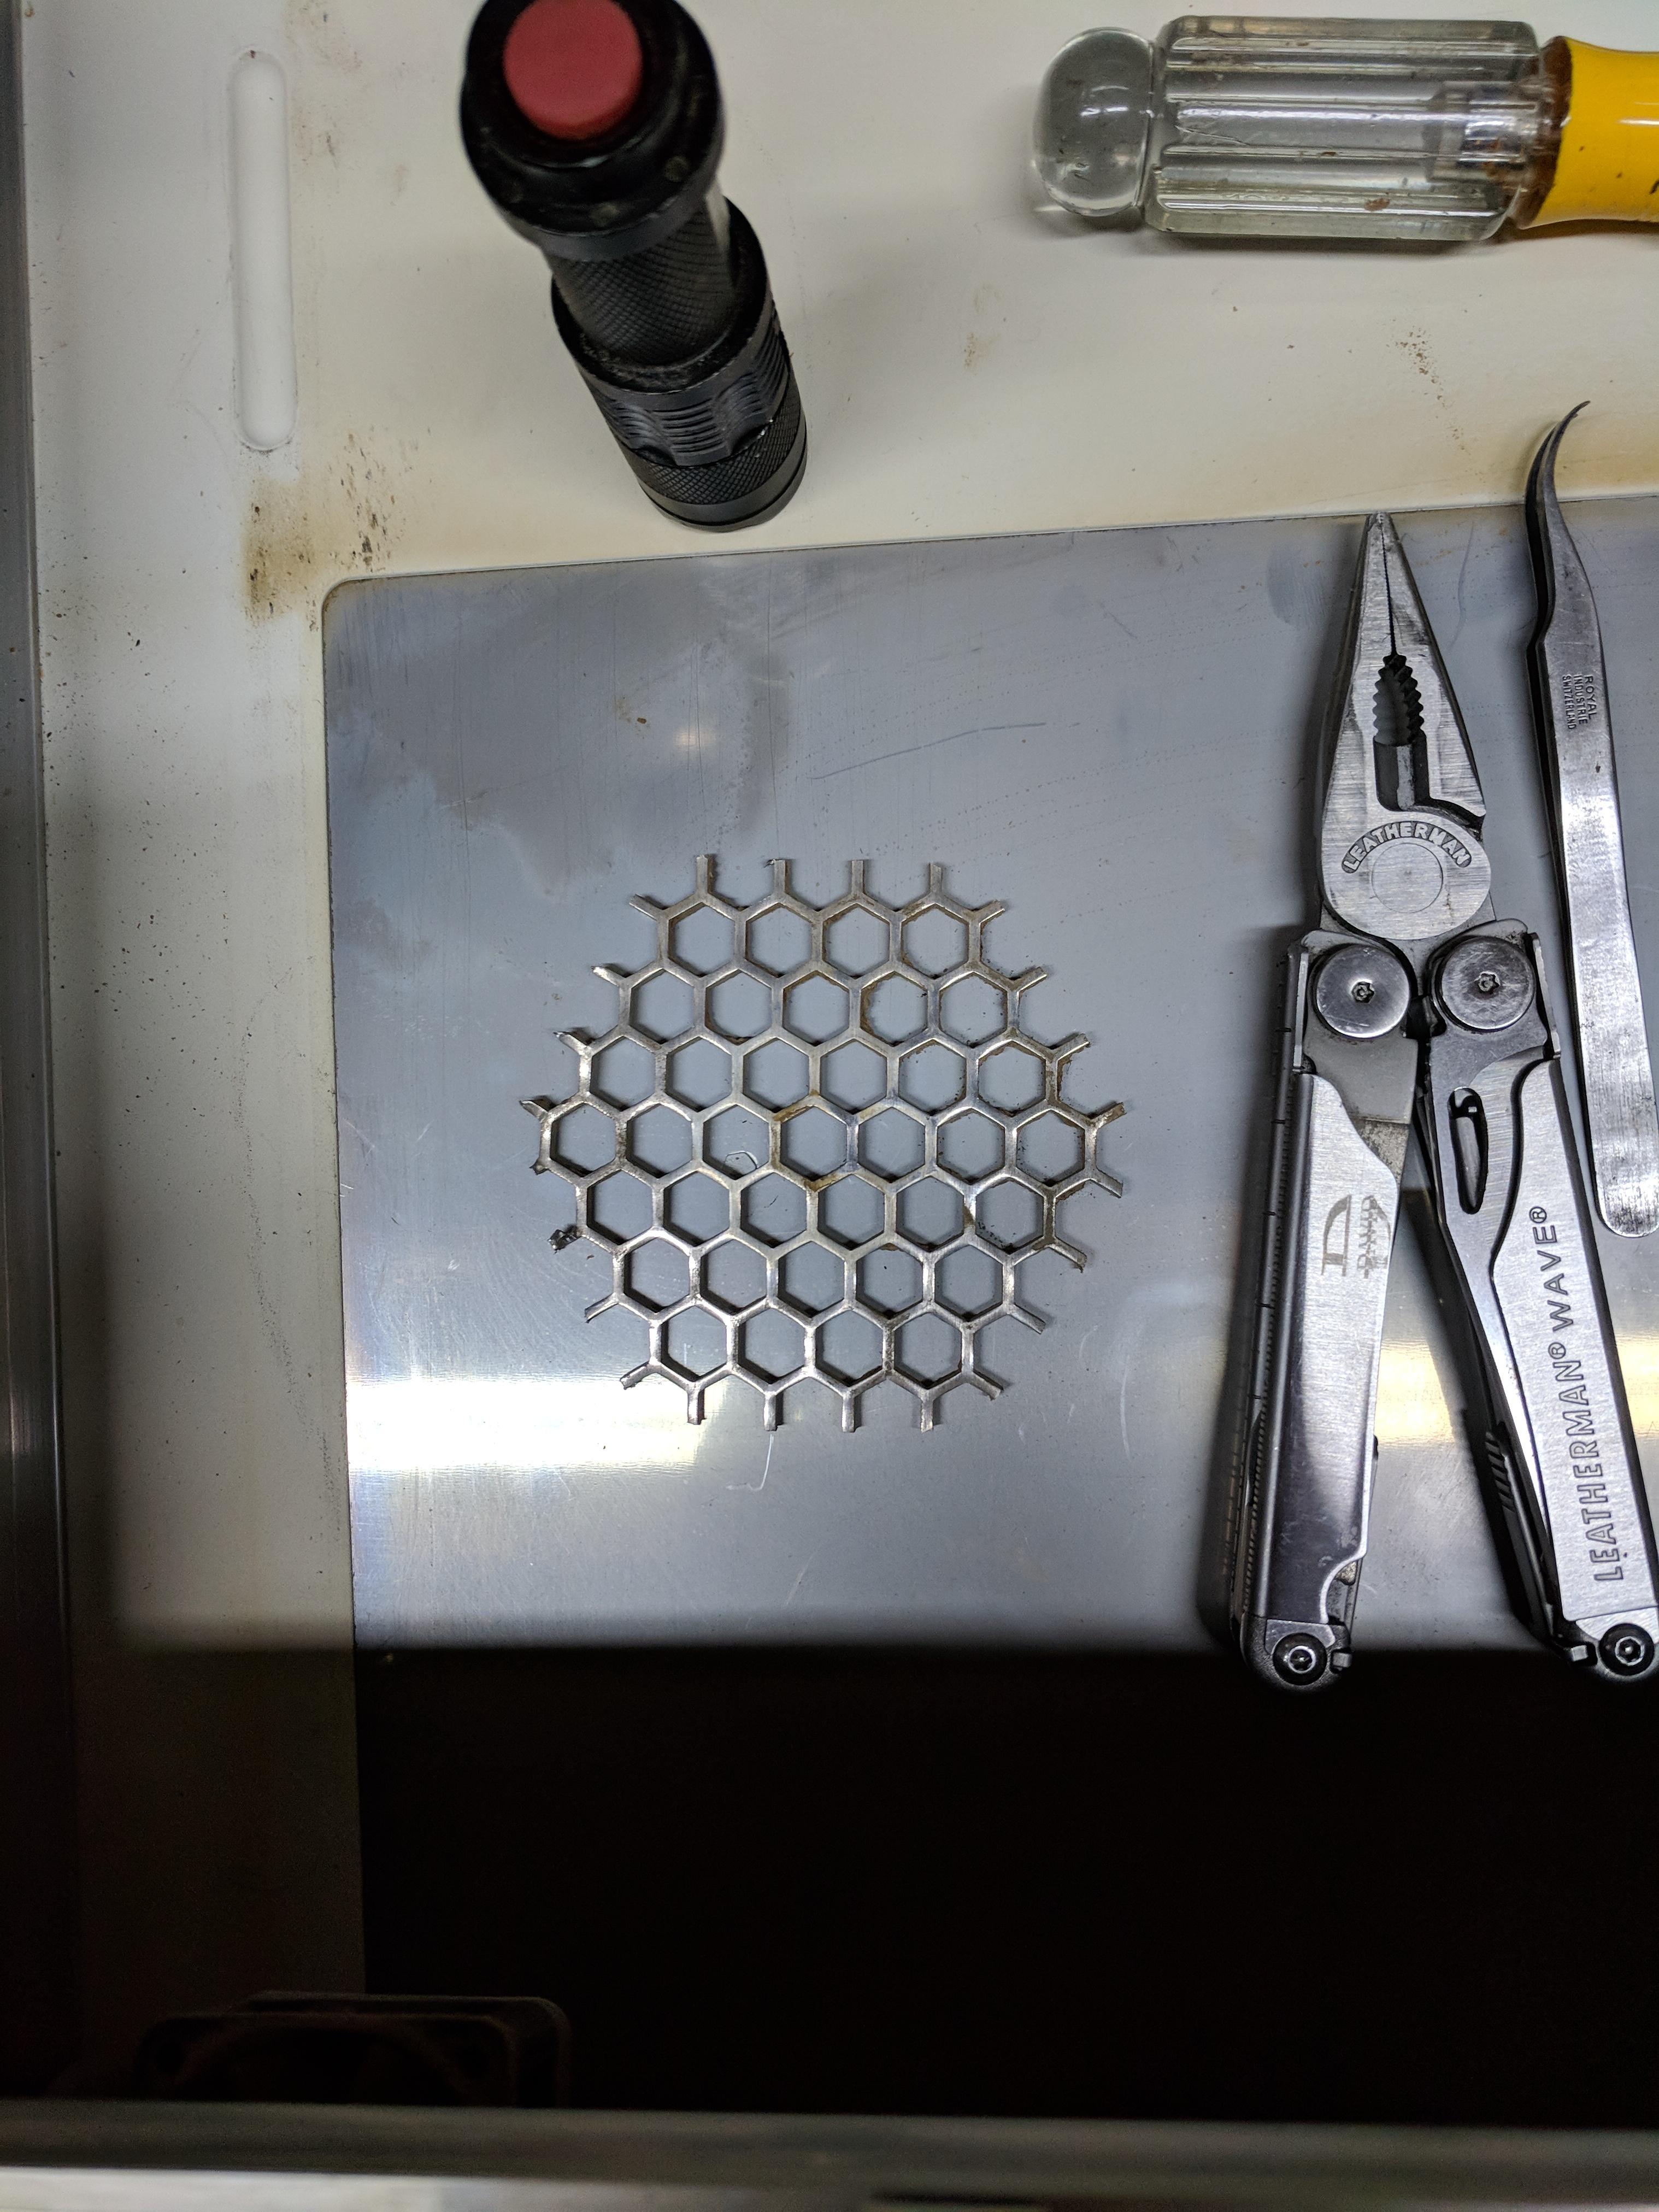
Good riddance.
All I know is the fan throughput is higher now, and I removed an inherent problem. The fan is running smooth as silk again.

Admittedly it will require that I am very careful not to yank the vent hose off and jam my fingers into a running fan, I am confident I can manage that.

Thanks for all your work Scott! :sunglasses:

13 Likes

Tearing a machine apart is one thing. Taking a metal saw to it…

That took some guts.

You’re a trooper! I gave up on that sucker a long time ago.

1 Like

Naw, What you did was fearless. This little mod was nothing compared to what you have done.
It is also due to you that I was able to do it without damage. Your exploration showed me exactly what I was faced with. We all owe you for that!

2 Likes

I am impressed. I have been cleaning my fan blades by contorting my arm inside the machine and rubbing the blades by hand, just by feel. I luckily have small girl hands :slight_smile: Pretty sure my warranty is up (isn’t it only a year?) so after getting my Christmas orders out I plan a cover off, fan out, silly honeycomb removal, project.

Have y’all tries cleaning your boards? I worry that the smoky tar buildup will create a trace of its own. I have some 99% alcohol and have thought I would perhaps use that to clean off the tar. I am mechanically savy, but not terribly electronically savy so asking about it before doing it.

1 Like

Warranty is a year. Not sure about the conductivity of the residue, @ScottW514. or others would probably know better than I, but I don’t think it poses an issue. Thanks to Scott’s exploration I learned that with care it is easy to remove the two side top covers without affecting alignment of the lid, which is anchored by the hinges to the back plate of the machine’s case and is independent of the two sides.
The right side stays really clean since the air flow is to the left, and you probably won’t need to worry about messing with that. The right side has the power supply, and I have no idea what if any capacitors that could hold a charge might be involved, so I would stay away from that unless I had the assurance of an authority.
I do know that since I removed the fan Grill the machine breathes better. Without the fan blowing directly into an obstruction it stays cleaner longer, and removes the eventual restriction caused by the grill. I am really happy with that grill removal and consider it a solid improvement. Much easier to clean the fan from both sides now without having to remove it. Better air flow, less turbulence, and a little quieter too.

Regarding cleaning of the boards, there are spray solvents specifically designed for cleaning electronics. Generally the method involves rinsing with a heavy spray that runs off carrying deposits with it. The solvent is quick to evaporate, so what I would do personally is prop the machine with the right side elevated so the rinse would run off and collect in the corner of the case where it could be mopped out. Even though it dries quickly I would give the interior extended time to ensure it is dry.

Clean is pretty, I’m not sure it is necessary to deep-clean the electronics. I probably will when I have to open both sides to replace the tube. There are many who run their machines more than I, so I expect to learn from thier experience.
I salute your proactive attitude. I think in general women have a little more finesse than a male Gearhead, so I am confident you can pull that off without a hitch. Let us know how it goes for you!

3 Likes

@PTL I am cleaning my fan. I have removed the foil tape, have a modified tool and am ready for the next step. I am hesitant to push/pull the plastic for fear of breaking it. Could you tell me if my thinking is sound?
I get under the tab and then pull it toward me trying to bend the top which is hooked onto the rectangle?

Thank you!

You see the bend at the end of my tool? That allows you to get under the tab and push down, prying the plastic tab toward you while the heel of the tool pushes out on the case.

The tabs are thick, and quite strong, which is why we feel anxious about how much force we have to put on the tool to get the tab to release!
Just be careful to increase the force gradually to get the tabs to release, don’t over do it - and just as you begin to worry about how hard you are pushing down on the tool, there will be a click as the tab clears the shoulder of the cleat that secures it. :disappointed_relieved:

Release them sequentially from back to front or front to back, don’t try to release the middle first.
You have removed the 3 screws on the lid side? One at the front and 2 at the back under the black rubber seal for the lid.

Once the top is off, you’ll see how easy it was to get that great access, and doing it again is easy.
Reinstalling it is as easy as positioning the top squarely and pushing down evenly the whole top at once. It just snaps into place, replace the three screws and you’re done!

There was mention on the forum about possible misalignment in the calibration of the machine, but since we don’t even touch the lid, I think that is a remote possibility are best. The lid is registered to the piece of aluminum that spans of the back of the machine.
My alignment is just fine, and since I removed that damn grill the machine breaths better.

2 Likes

Suzanne, I recently acquired a shop vac, and I highly recommend it.

  1. I cut some intricate designs, leaving hundreds of little pieces behind. The shop vac makes short work of cleaning them off the honeycomb bed.

  2. With a long bristle, upholstery type attachment on the hose, it cleans up a lot of gunk in that left side well. It doesn’t get everything, but enough. And since it’s the longer, softer, bristles, I don’t worry so much about dislodging any connections.

1 Like