From the manufacturer, the Boundary Devices Nitrogen6X SOM V2 used by the OpenGlow boards come with a customized u-boot image designed to work with their development boards. Since the OpenGlow utilizes the hardware a bit differently, you will need to update the bootloader on the SOM before you can use it with OpenGlow.
The process is pretty straightforward, and reversible in case you want to use the SOM for something different at a later time.
Step 1: Prepare the Boot Image
If you haven’t done so already, you’ll need to build a bootable image of the OpenGlow firmware. It’s pretty easy, and the instructions can be found here.
When that’s completed, you’ll find a fresh copy of u-boot.imx in the same directory as the main firmware image (tmp/deploy/images/openglow-std). You can also find a copy here.
Make sure to write the full firmware image to an SD card, and copy the u-boot.imx somewhere handy.
Step 2: Obtain the Flashing Utility
Ubuntu Linux
Boundary Devices has been nice enough to provide an easy to build version of the Freescale utility. You can find the source here.
To build, you will need the libusb dev library:
~$ sudo apt-get install libusb-1.0-0-dev
Now, just clone, build, and be happy:
~$ git clone git://github.com/boundarydevices/imx_usb_loader
...
~$ cd imx_usb_loader/
~/imx_usb_loader$ make
Windows
Again, we can thank Boundary Devices for making this easy. A pre-compiled executable can be downloaded here.
Copy the u-boot image from the handy location to the same directory as the utility.
Step 3: Boot Into Recovery Mode
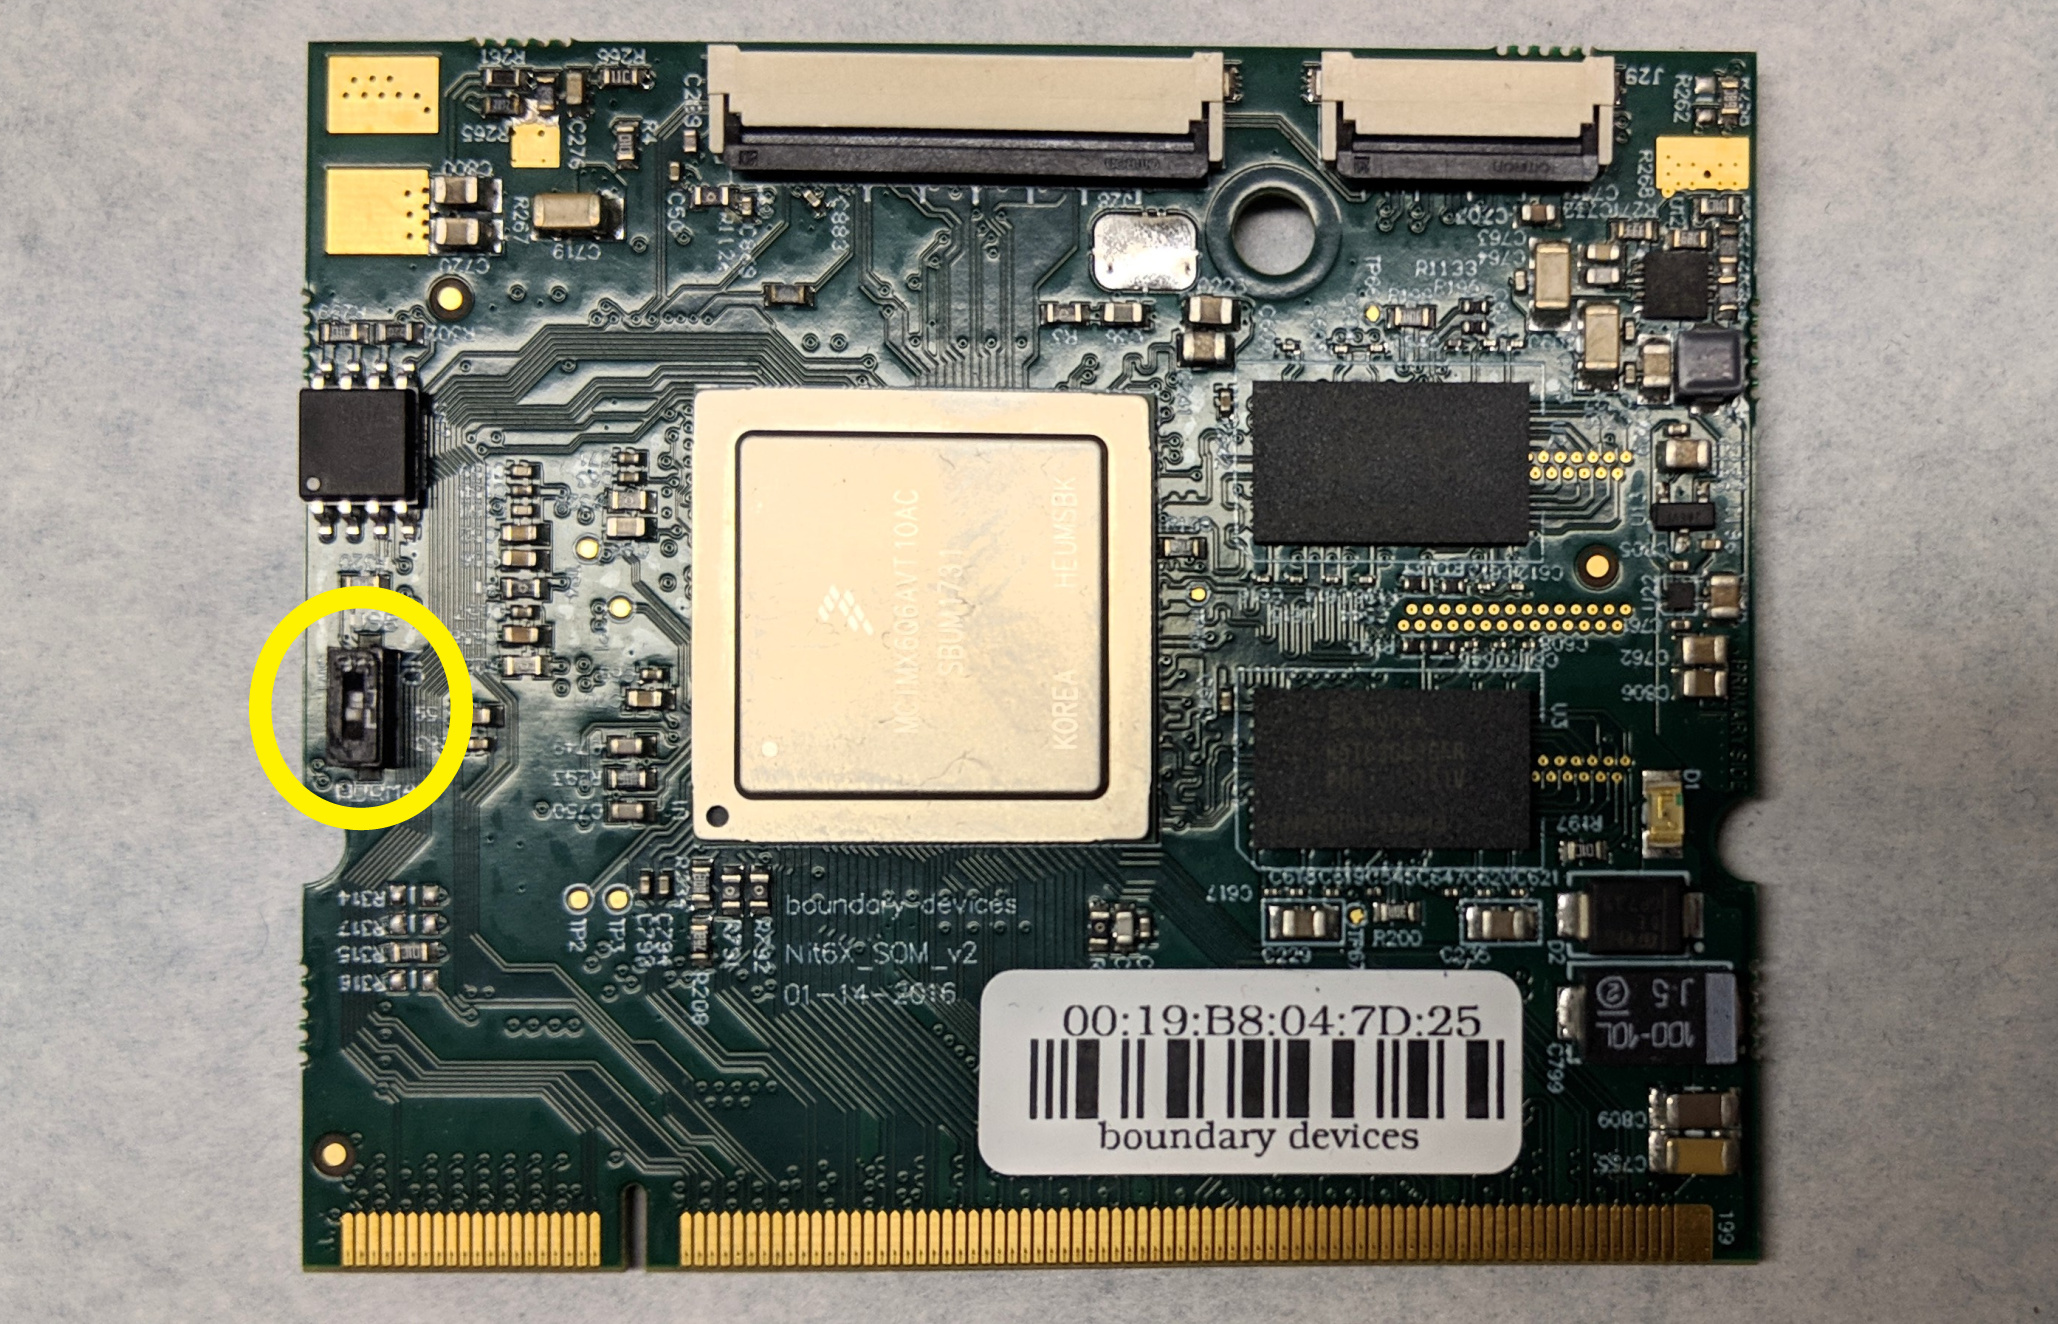
Insert your freshly burned SD card into the OpenGlow, connect the OpenGlow to your computer using a USB cable plugged into J11, and set the boot mode switch on the SOM to the “ON” position (up position, as orientated in this picture):
You will also need to connect to the console port (J10) on the OpenGlow, and fire up your favorite serial terminal client (115,200 8N1).
Power on the GlowForge, and you should see a new USB device appear (output below assumes Linux. On Windows, you can check the Device Manager):
~/$ lsusb
Bus 006 Device 012: ID 15a2:0054 Freescale Semiconductor, Inc.
(actual reported ID will vary)
The serial terminal should not display anything, as the SOM is now waiting for the next step.
Step 4: Upload and Execute Bootloader
From the command line, execute the following command:
~/imx_usb_loader$ ./imx_usb u-boot.imx
Quickly switch back to the your serial terminal, and you should see the initial boot messages.
HIT ANY KEY TO STOP THE BOOT.
If you are not quick enough and the device fully boots, you’ll need to hit the reset button on the OpenGlow and start this step over.
If you were quick enough, you should now have a u-boot command prompt:
=>
Step 5: Install New Bootloader
At this point, we are only running the bootloader in RAM, we haven’t actually installed it to the SOM’s serial boot flash. If you reset the device, it will boot back to the original version.
To install, execute the following commands:
=> env default -a
=> savee
=> run upgradeu
...
=> reset
At this point, the unit will reset. It will not boot, though.
Don’t panic - you didn’t brick the device. It’s just still in recovery mode.
Slide the switch from Step 3 into the OFF position (you can safely do it with the power on), and press the reset button on the OpenGlow.
You should see the OpenGlow boot fully to the Linux login prompt (it should only take a couple seconds).