Lid Cable Problems

A widely reported issue on the Glowforge has been failure of the flat flexible cable (FFC) that connects the main chassis to the lid.

The FFC:

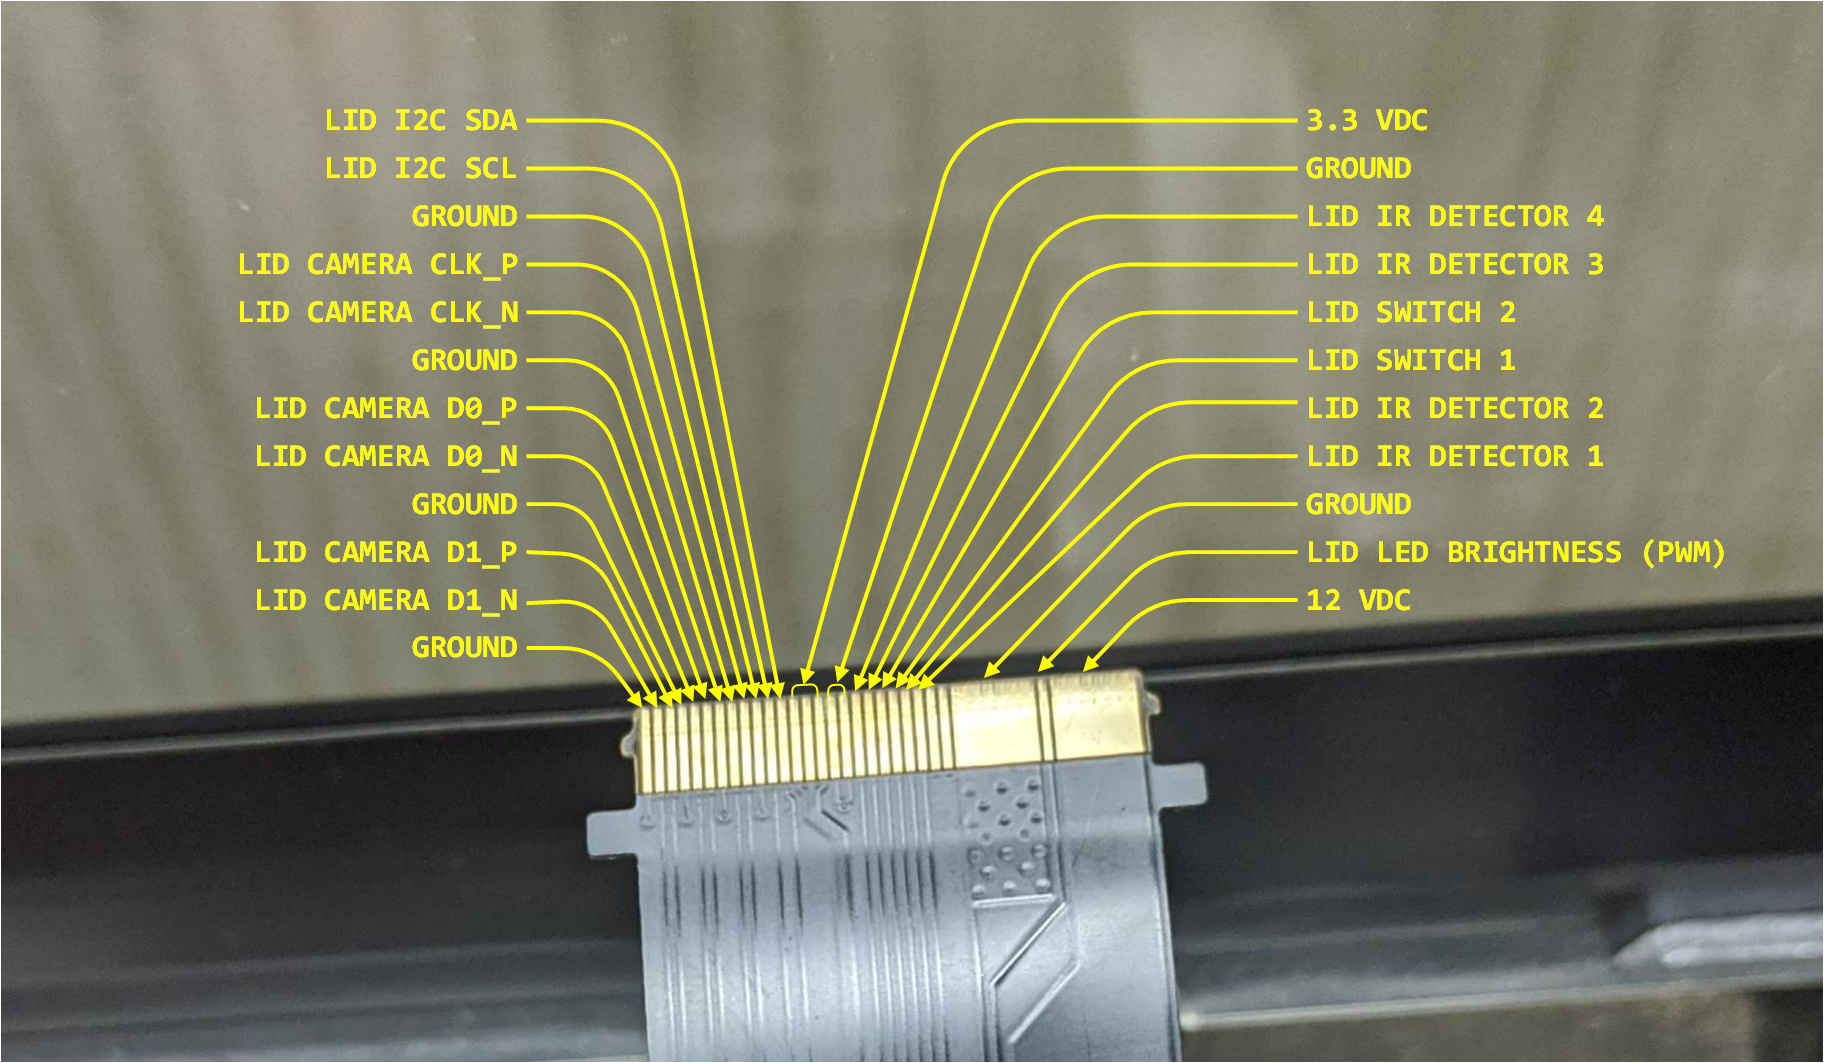
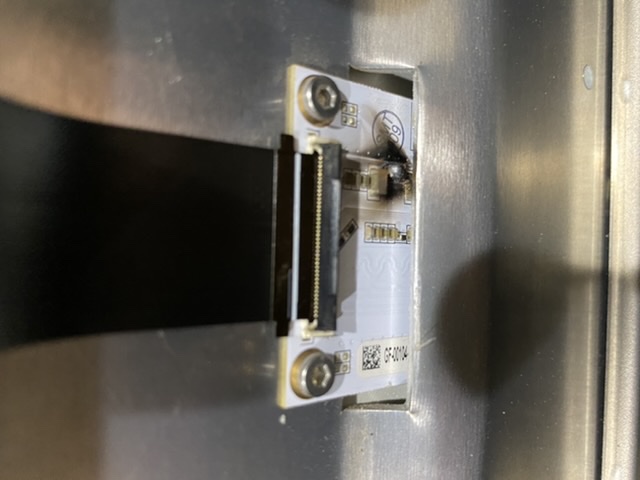
The FFC connects to a circuit board mounted to the rear of the chassis, which connects to another cable assembly that runs to the main control board (J4). This cable carries power, lid closure, LED brightness control, IR detector, I2C bus and lid camera signals.

The problem with this cable comes down to a mechanical design issue. The cable runs near a sheared and somewhat sharp edge in the chassis.

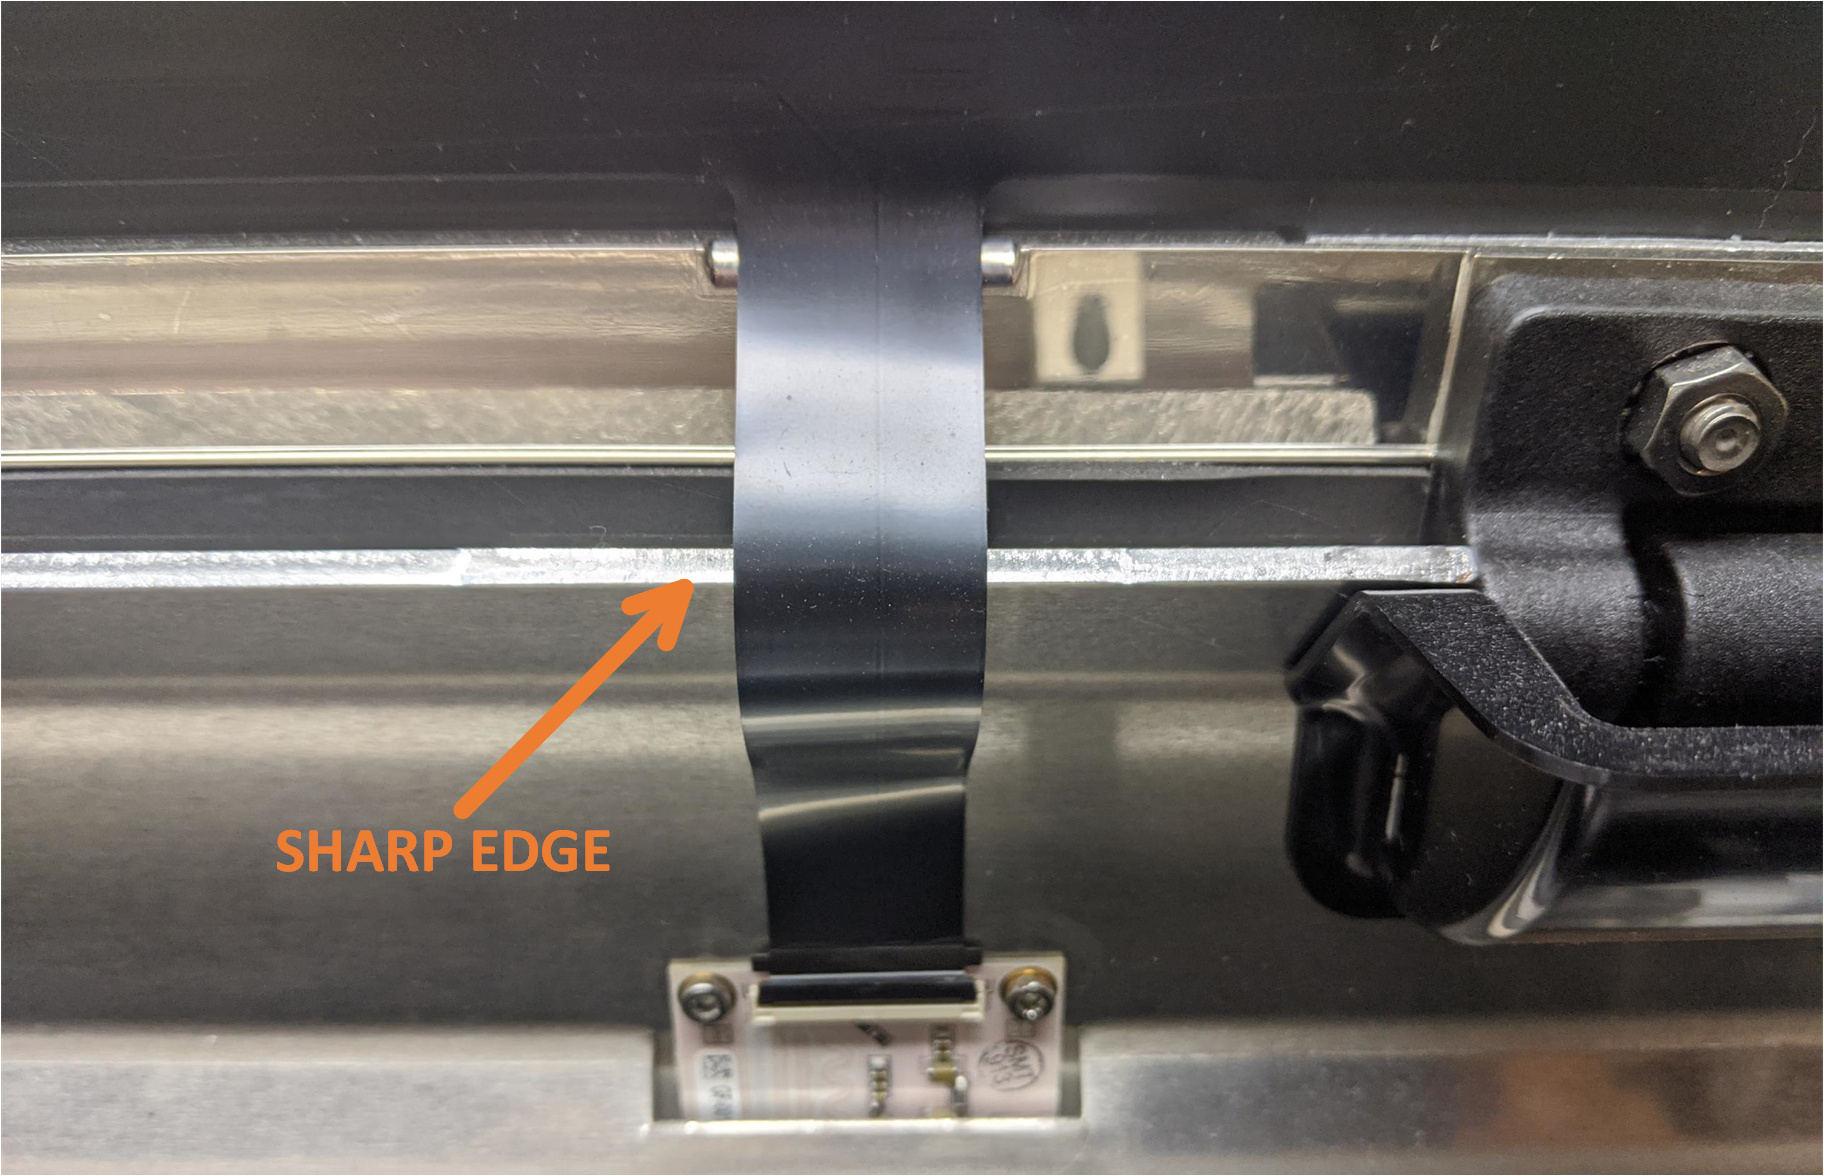
The cable was not made long enough to avoid contact with the sharp edge when the lid is swung to its maximum open position.

Repeated contact with the sharp edge will eventually wear through the cable causing failure due to electrical shorts from contact with the grounded sharp edge, or due to breaks in the electrical traces.

Glowforge has been sending out replacement cables to impacted users (not sure if they are sending these for free to owners with out-of-warranty units). As usual, GF is tight lipped and it is unknown whether this design flaw has been remedied on later production units - I’d be interested to hear from owners of recently produced units.

If the cable on your unit makes contact with this sharp edge, you can do a couple things to reduce the likelihood of failure. First, you can avoid opening your lid to its most upright position. Second, you can place a piece of duct tape over the edge behind the cable. I’d suggest being careful not place too thick of a barrier behind the cable, as this may cause mechanical stress on the connector and cause more problems…

If your cable has already failed, you are at the mercy of Glowforge. This cable is a spec part, and there are no generic replacements available.

For the curious, here’s what this cable carries:

3 Likes

Should a person decide to deburr / round off the edge of the aluminum frame then the cable needs to be removed.
Cable is attached to the metal frame with a small square of double sided tape just above the connector.
To remove the tape, warm with a hair dryer or other such heating device.
Connector has a secondary retention clip that folds towards the front that allows the cable to be removed.
When reinstalling … a smaller piece of tape closer to the connector will allow a longer flex area for the cable.

I have replaced this cable three times so far. The first was under warranty, the next two I had to pay for.
On my Glowforge the cable does not touch the edge of the frame, but it kept failing.
Even though the cable is attached to the frame with tape, I believe that over time as the lid is opened and closed, the cable moves within the connector causing an open or high connection.
I made a simple strain relief that eliminates any movement of the cable at the connector. I also put a piece of duct tape over the connector to keep smoke and gases from contaminating the connector.

3 Likes

I replaced my cable, but it was the board that it connects to that needed the replacement, due to corrosion. I live in a high humidity environment, and I’m pretty sure at some point a year ago, I probably hit that board with a little bit of windex when cleaning. I know it’s speculated that the edge of the machine “wears out” the cable, but from what I’ve seen, it seems the cable itself fails due to the repeated bends in it causing the wiring to break. I haven’t seen anyone post a picture showing the cable to have wear on it, and another user pointed out that if he keeps his cable bent at a specific angle, he can get use out of his broken cable (I’m sure he’s had a replacement sent to him by now). Not to say that there aren’t users who have had their cables actually wear out, just that I haven’t seen the proof of this.

The newer machines do in fact have a longer cable, as well as the replacement cables being sent are longer themselves. Here is a picture of my cables side by side

3 Likes

Completely new here, looking for some help. Did you end up replacing the board that the cable connects to? I had to replace the cable but unfortunately didn’t replace it correctly and fried something on that board. I’m hoping thats the only thing that needs replaced but hoping to find some guidance on how to replace it.

Yes I did, I actually wrote a full tutorial on the official forum:

Thank you so much! I actually found that post on the official sight after posting on here and then doing more search on there. So when I replaced the cable it wasn’t connected correctly apparently and a welded piece on the circuit board lit up like :fire: and of course the lights didn’t work and neither did the camera. Do you think it’s just the board and maybe the cable that needs to be replaced again or do you think it might have done damage to the camera as well?image

Everything in the lid is routed through that board, so if it’s bad, which is definitely the case here, then none of the other stuff should work. With that said, your black cable may be fine, and one way to check is if the contact pads at the end look good still. You should be able to just flip the cable up and examine it to see if those contact points still look clean, or if they look burned. It’s really hard to say if anything else is actually damaged before having the replacement board installed, you could have even done damage to the white cable that attaches to the board at the bottom. I was out of warranty so I didn’t have anything to lose when attempting my repair.

Yeah, we are out of warranty as well. They quoted me a minimum of $700 with shipping there and back. Apparently the boards only run around $11 so I might just take my chances. Thank you!