Here’s an easier way to get serial console access to your Glowforge if you have one without the factory installed serial port (or your cat can’t resist pulling on loose cords and ripped yours off - happened to me. True story).
I previously described the more involved way of getting access, which involves some tedious surface mount work.
Here, I describe a much more reasonable method…
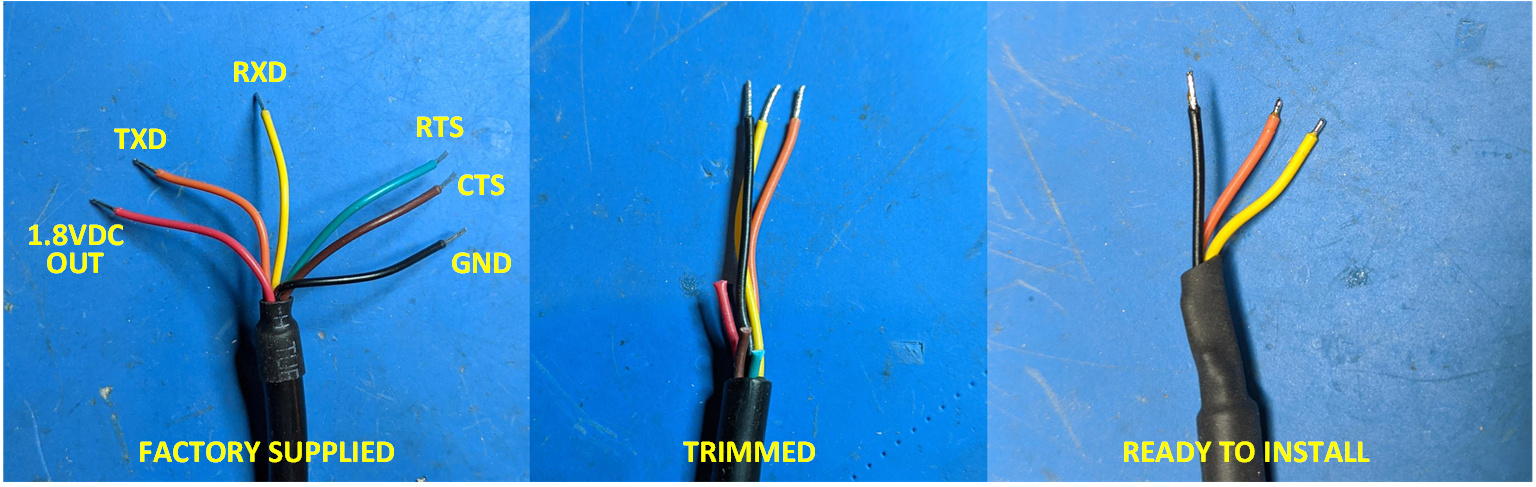
First, you will still need a soldering iron. No getting around that one. Next, you need a FTDI TTL-232RG-VREG1V8-WE USB to Serial Port adapter. It is important that you get the 1.8V model. If you get a 3.3V or 5V version you will irreversibly destroy your control board. You can purchase this directly from FTDI, Amazon, or most electronic supply shops.
When you receive your adapter, you’ll need to prep it. We only require three of the lead wires. The others should be trimmed (to unequal lengths, lest they short out when you heatshrink/tape them up).
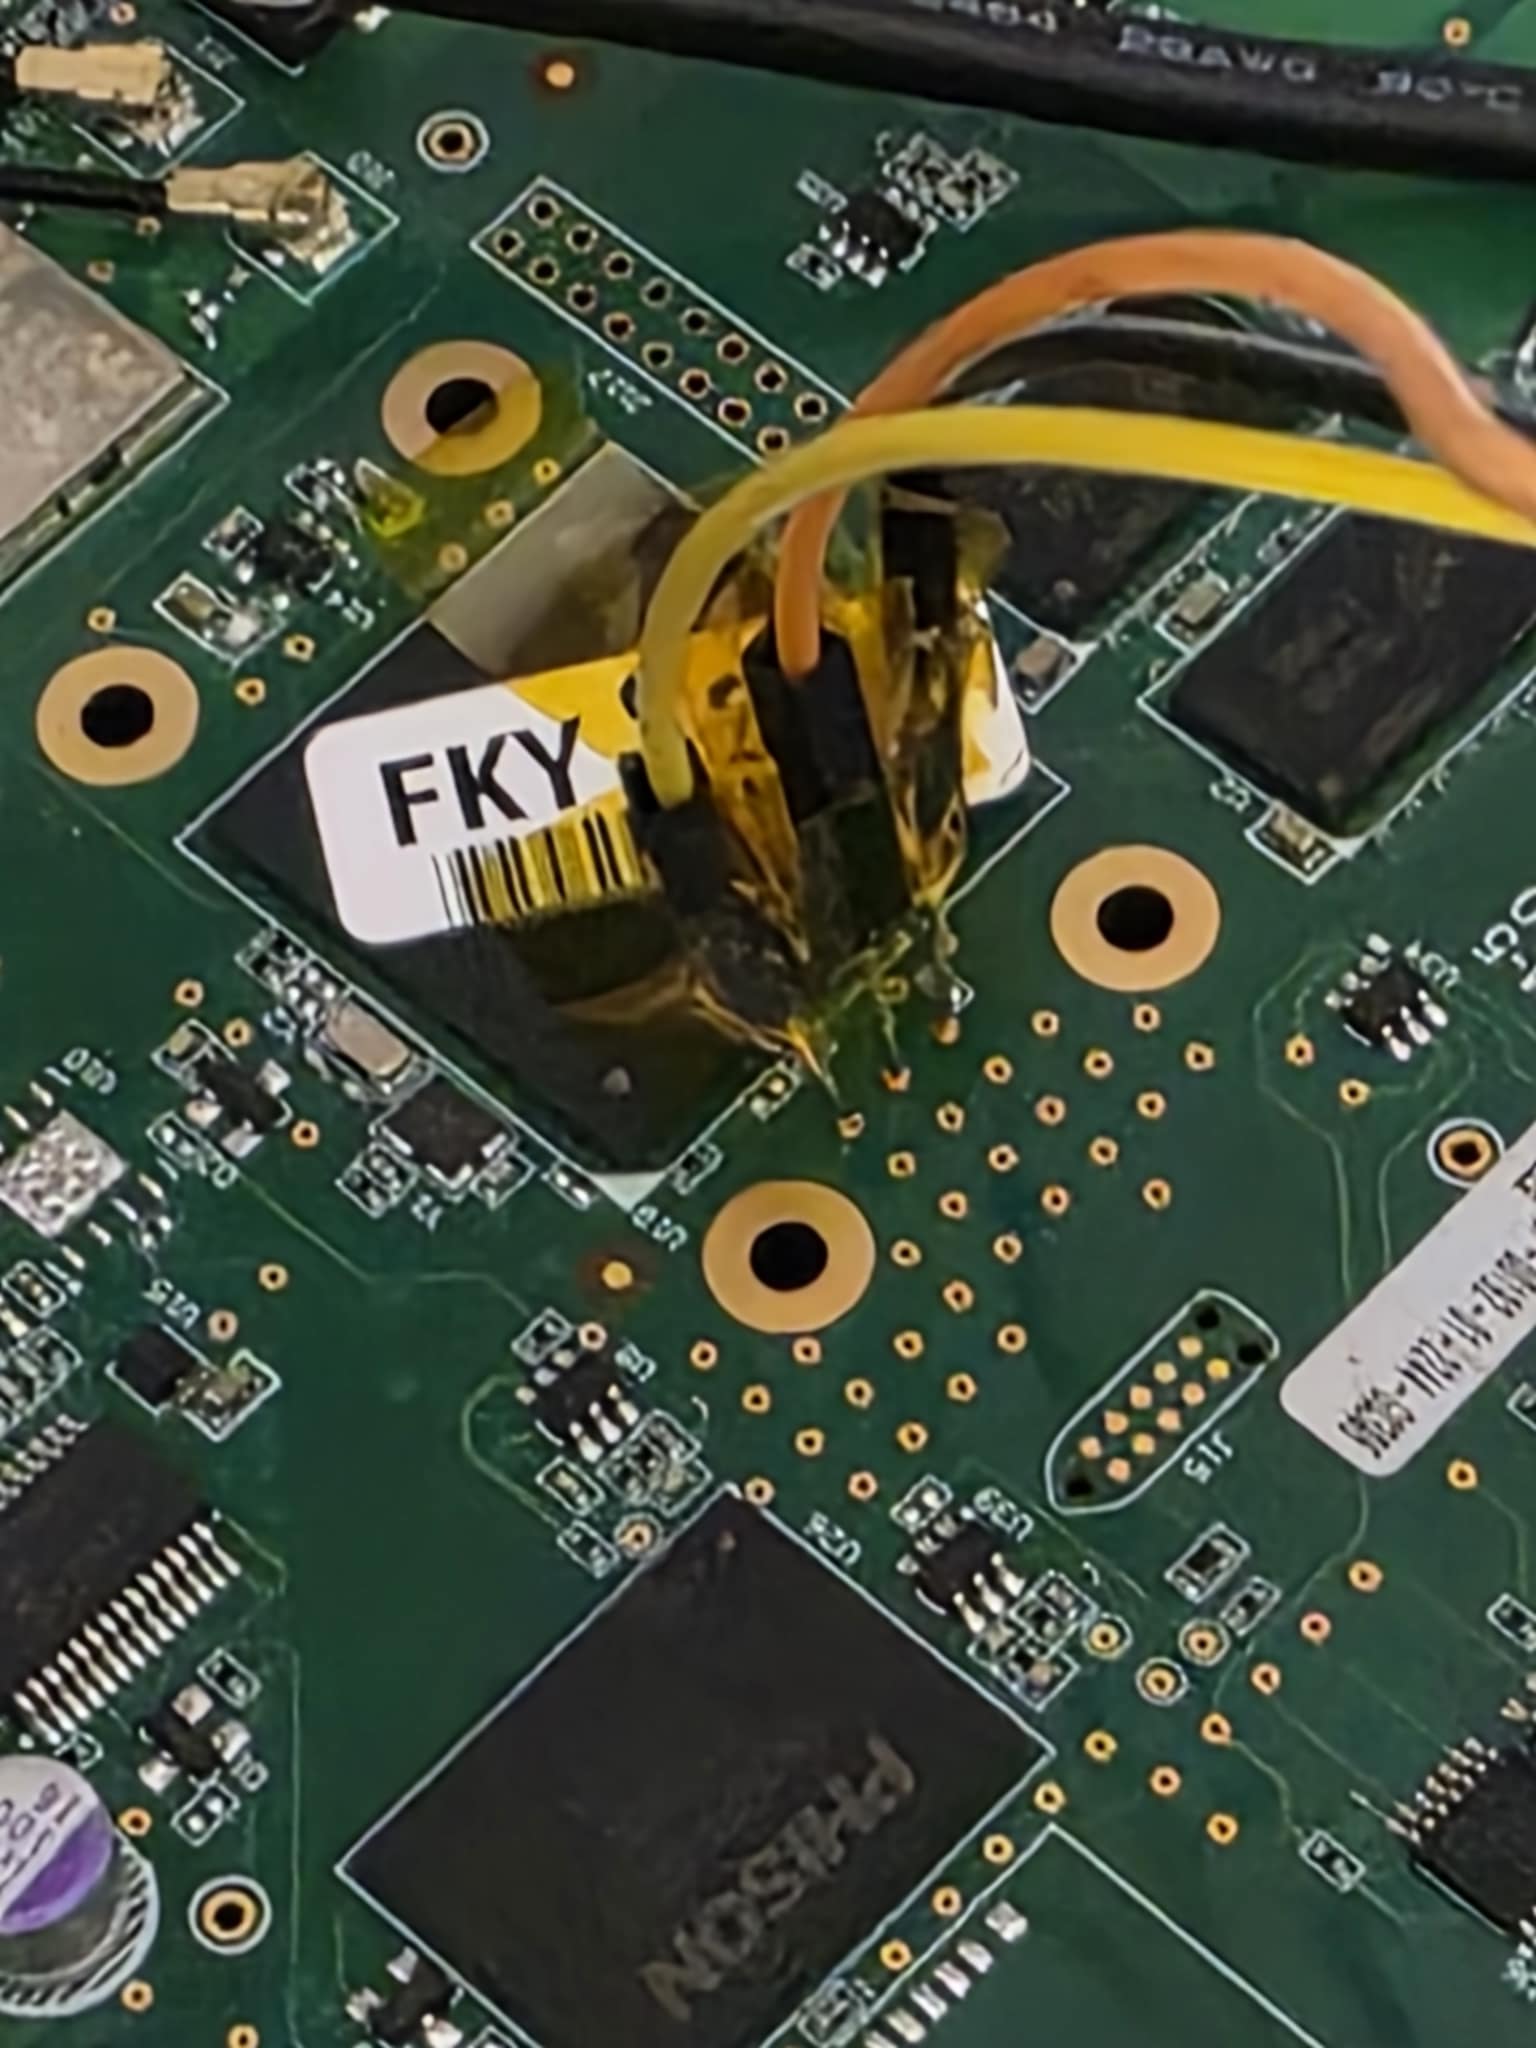
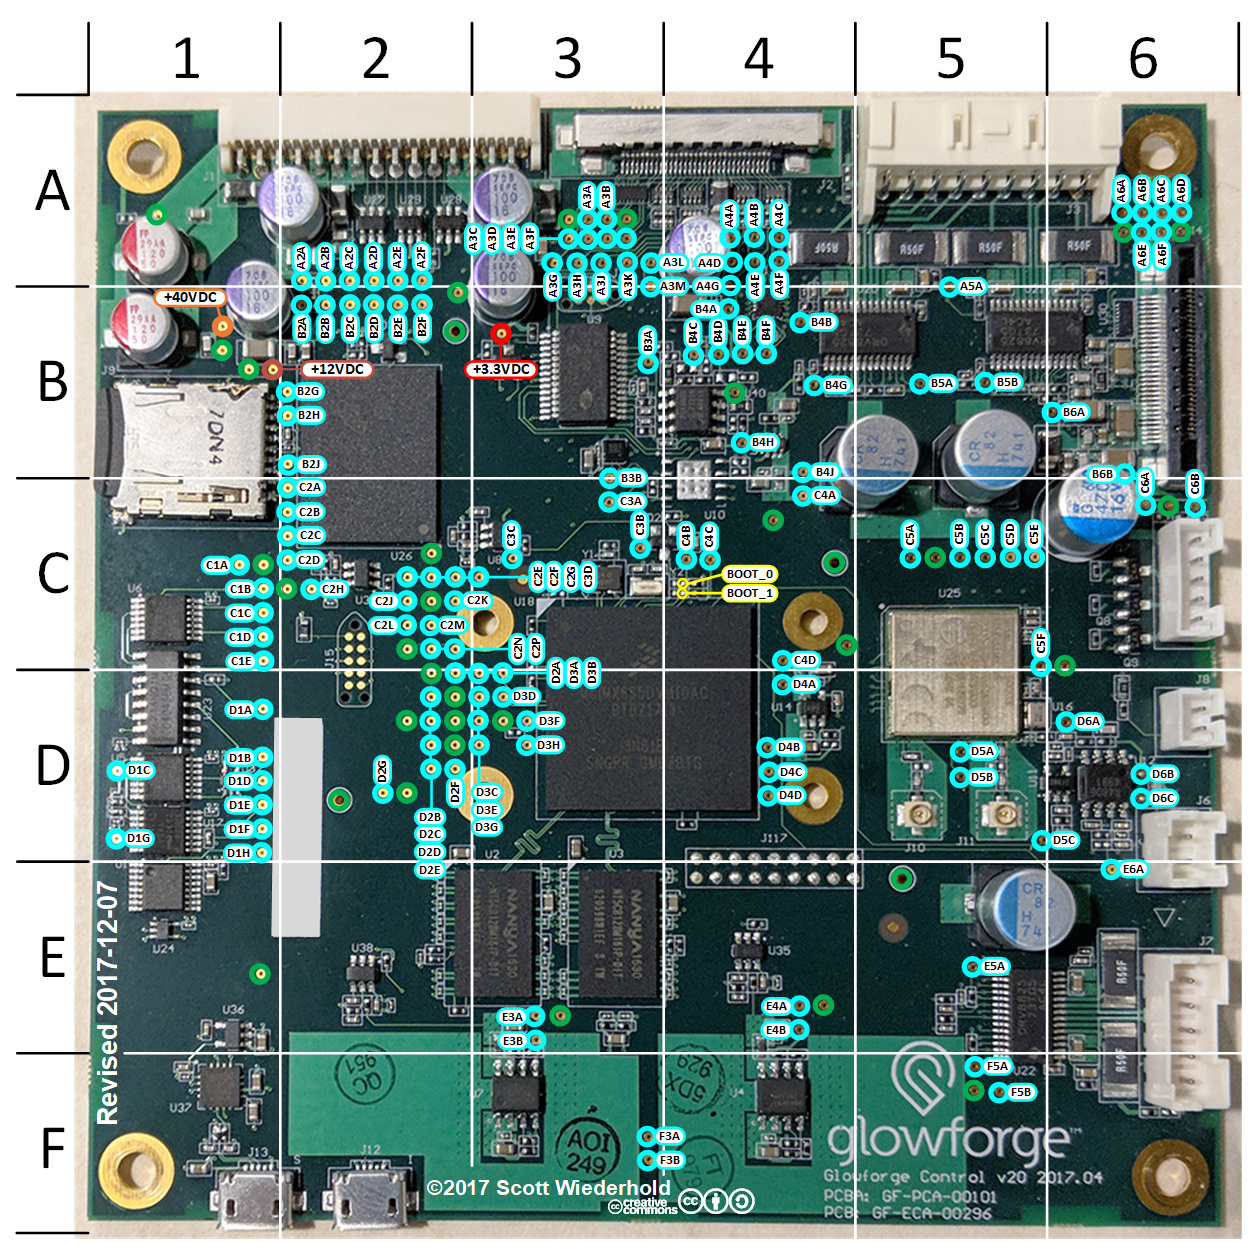
We’ll be connecting to the microprocessor’s serial console port test points: RXD: D3B, TXD: D3D.
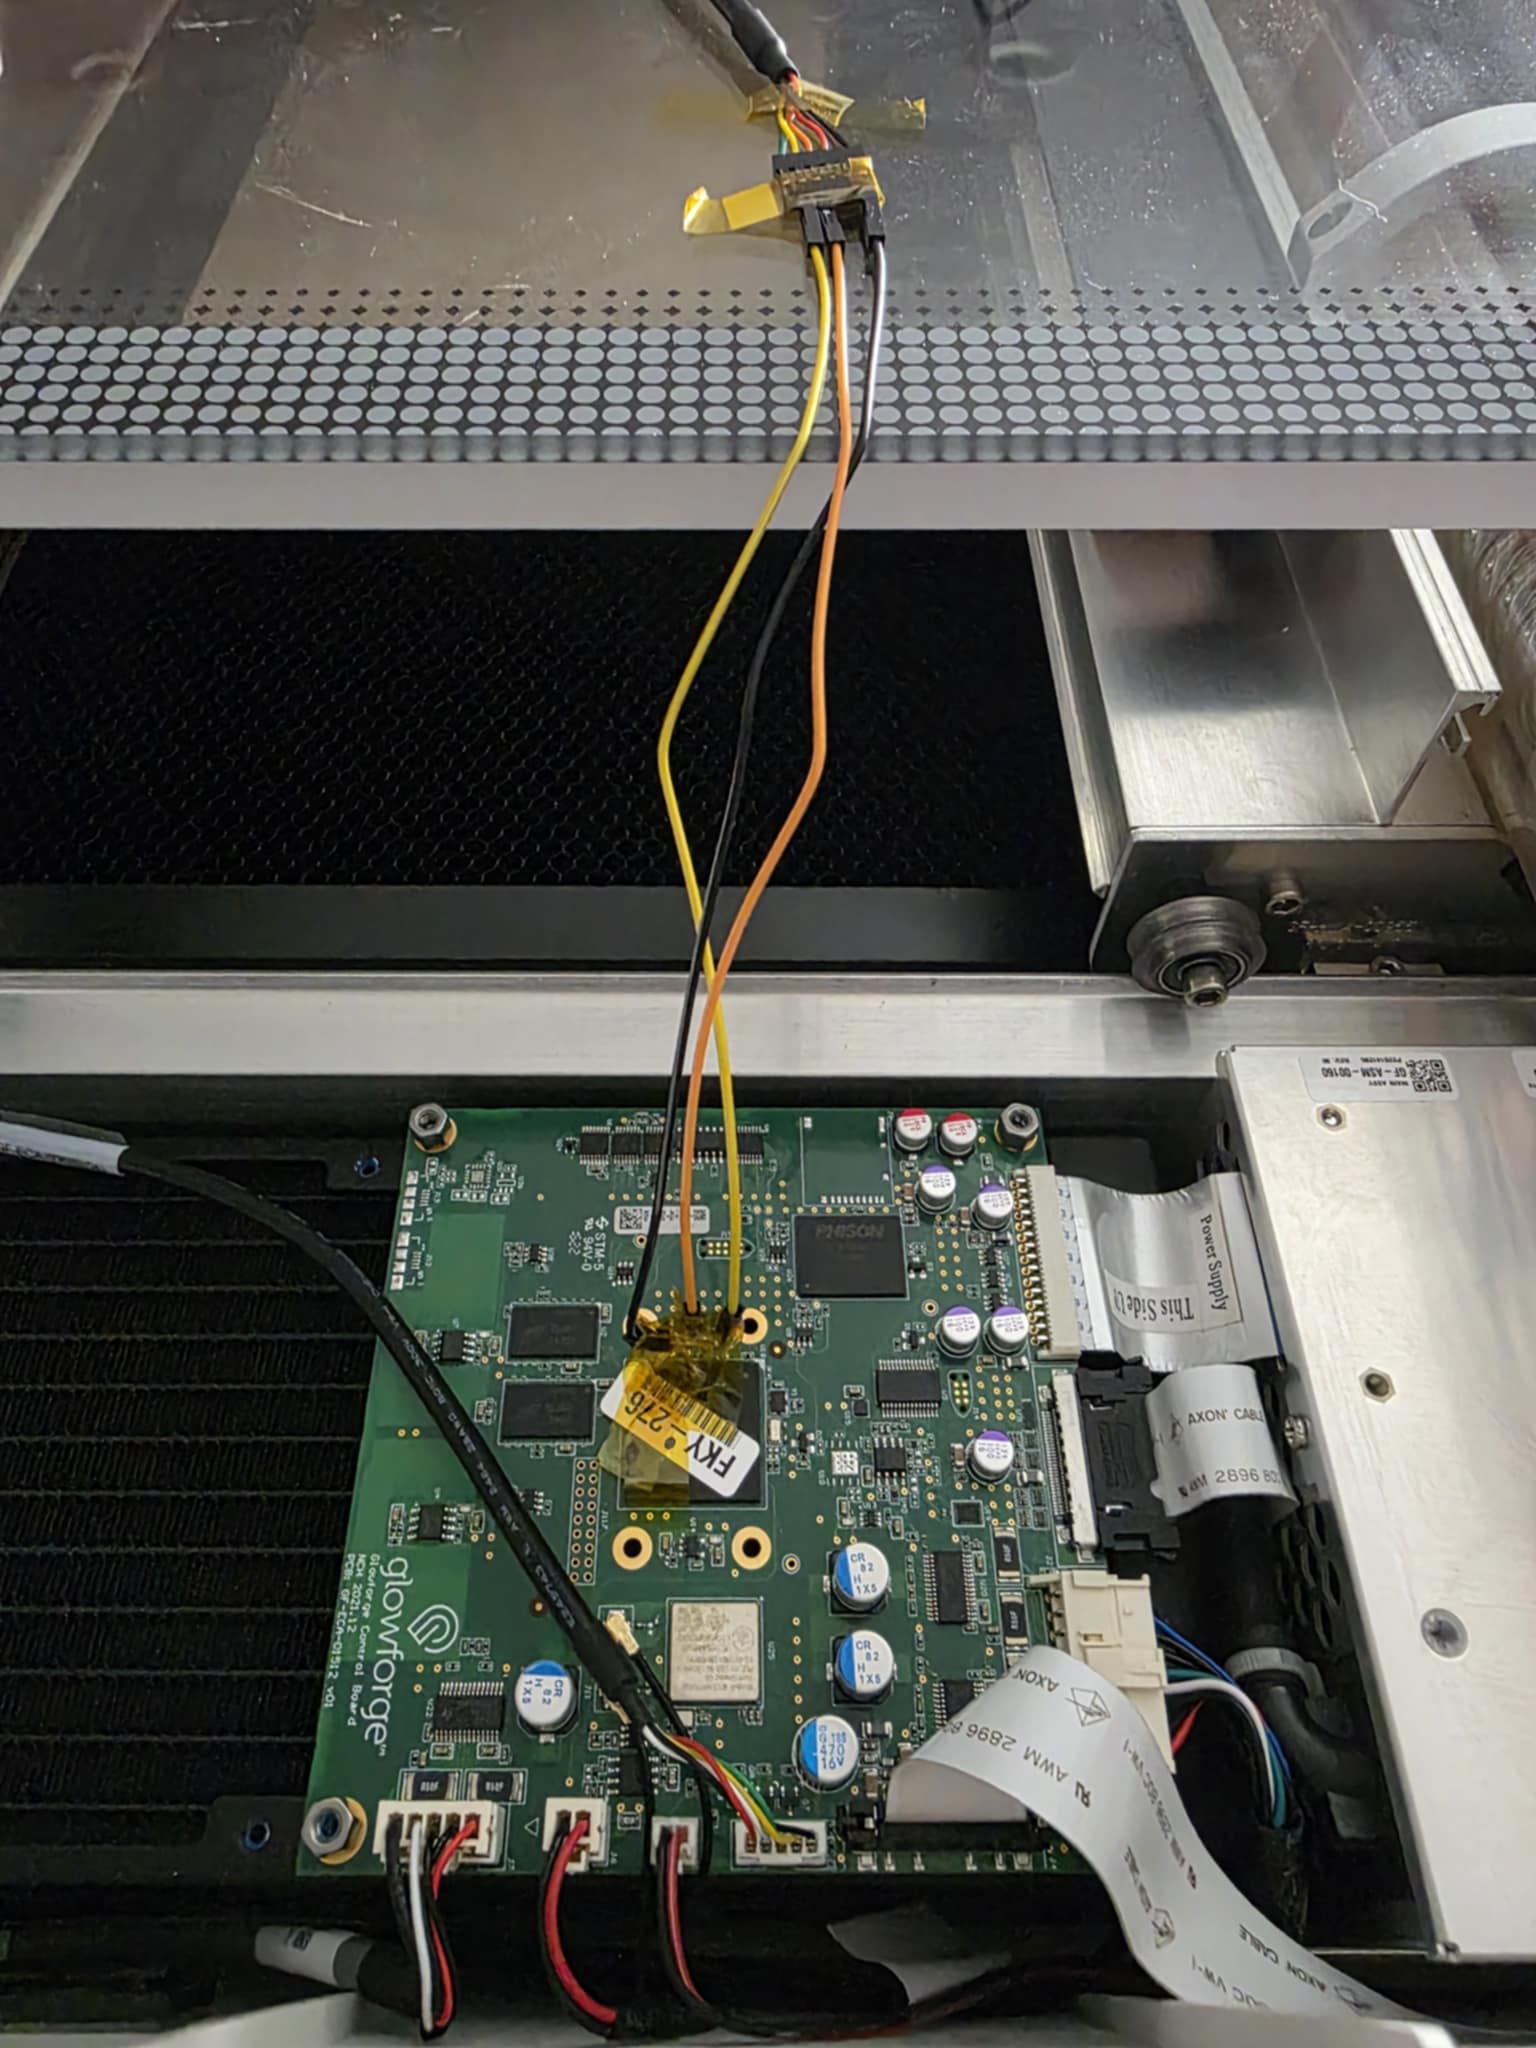
I recommend soldering the ground wire first to the ground pad located to the upper left of the microprocessor (see picture below). Clip the leads for the TXD and RXD to be no longer a millimeter before soldering. This helps to avoid unwanted contact with surrounding items.
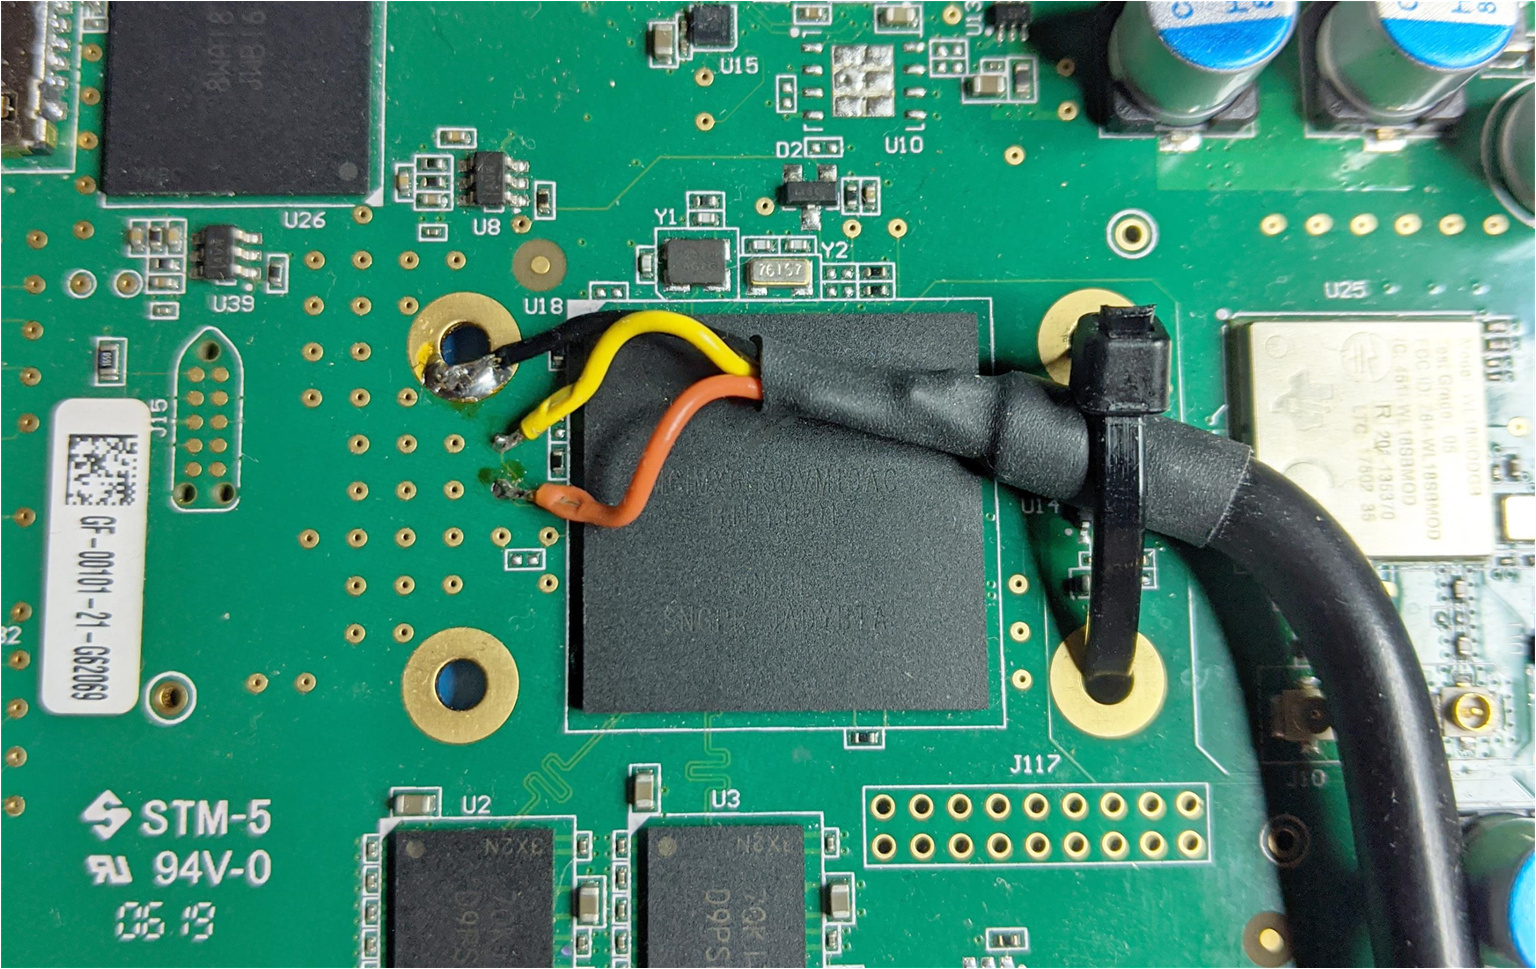
After you’ve soldered all the leads, secure the cable to the PCB with a tie wrap, as pictured. This is important. The test points will not stand much mechanical stress, and will rip off the board easily. Don’t worry, if this happens to you, they are still accessible from the bottom of the board - second chance.
From there, connect the USB cable to your computer and fire up your favorite terminal (Putty works well). The serial settings are 115,200 8N1. Be sure to select a color terminal with UTF-8 encoding if you want the best experience from the OpenGlow firmware.